Entering Mobile Inspector Reports
A Mobile Inspector Report is required daily. Work with crew office staff and consult the Documentation Manual à Inspector Guidance topics in this Knowledge Base for Report documentation specifics.
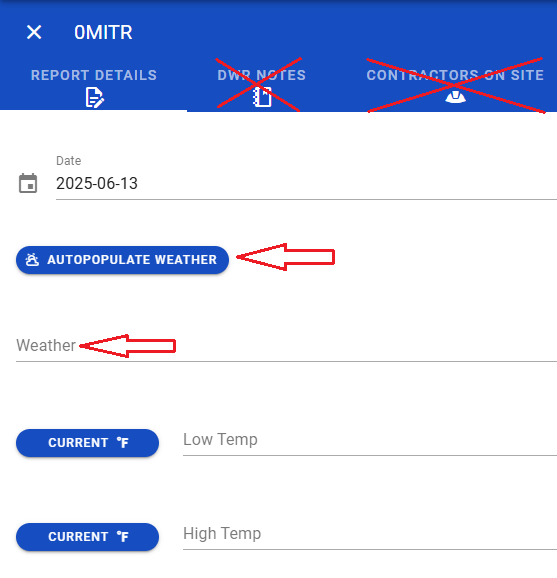
REPORT DETAILS
- Tap on Add Report in the Contracts list to create a new Report.
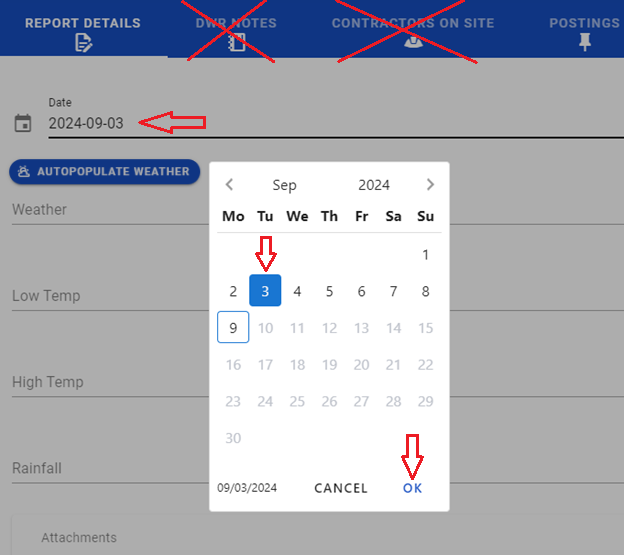
- Tap on Date, select/change the date of the Report in the pop-up window, and tap on OK. For a new report, the program defaults to the current date.
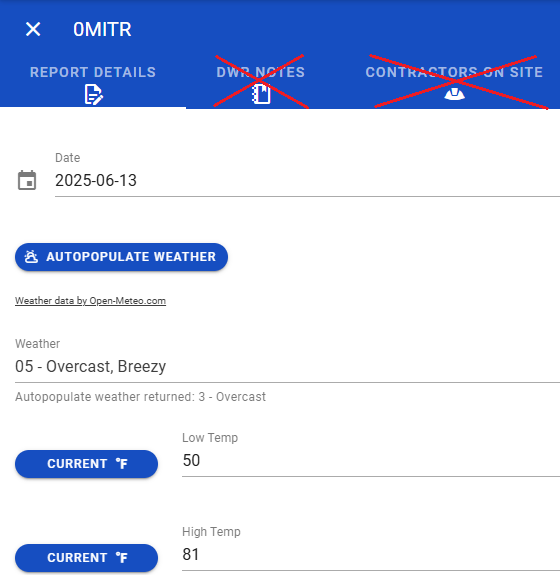
- Tap on the AUTOPOPULATE WEATHER button (MUST be connected to WiFi to use this function) or on Weather.
- When the AUTOPOPULATE WEATHER button is used the weather is updated based on the location of the iPad.
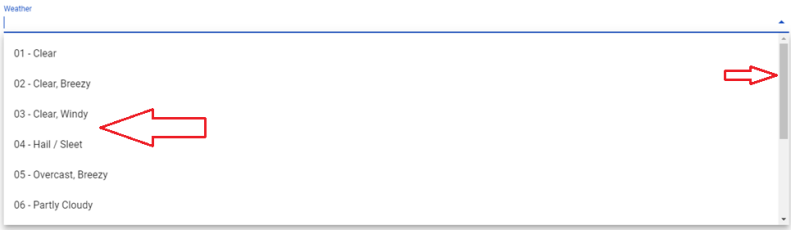
- When clicking on Weather, tap on the appropriate Weather type. Use the scroll bar for more weather options. To add additional information on the weather, use the Remark Type 12 (See step 7 below).
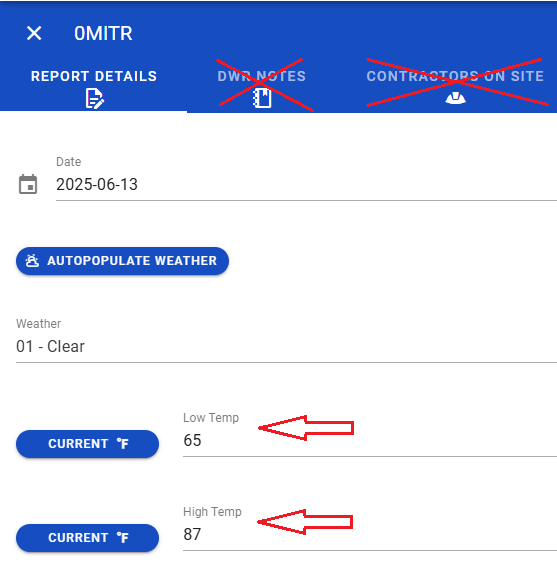
- Enter the Low Temp and High Temp (°F). Do not add anything in the Rainfall Amt. field.
- When the Report requires an Attachment, tap on the Attachment icon. Do Not take or attach photos in Report Details. ALL job site photos should be sent to the crew office in an email. The email subject should contain the contract ID, Inspector's name, and the date of the Report.
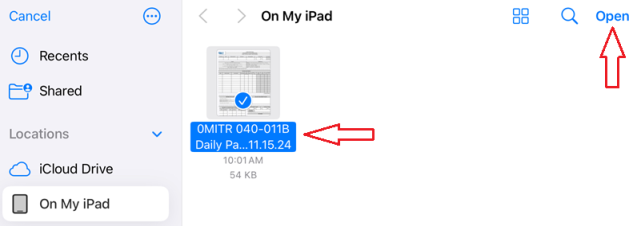
- Tap on Choose Files.
- Tap on the file to attach, then on Open.
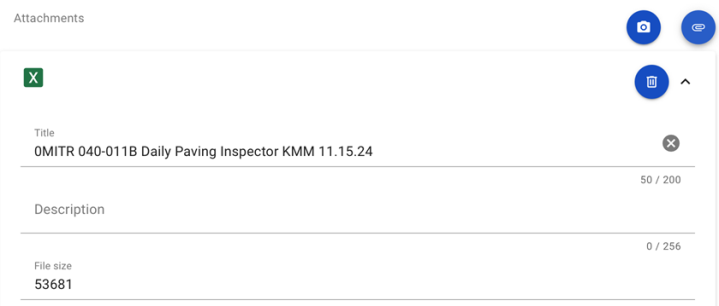
- The file is now attached to the Report. An additional Description can be added if appropriate.
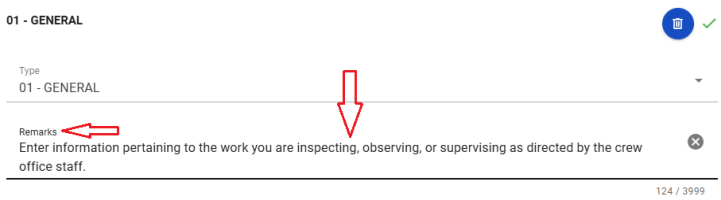
- Each Report requires at least one Remark. Tap on ADD REMARK.
- Tap on Type to open the Remark types.
- Tap on the appropriate Remark type(s). More than one Remark can be selected.
- Tap on Remarks and enter an appropriate remark.
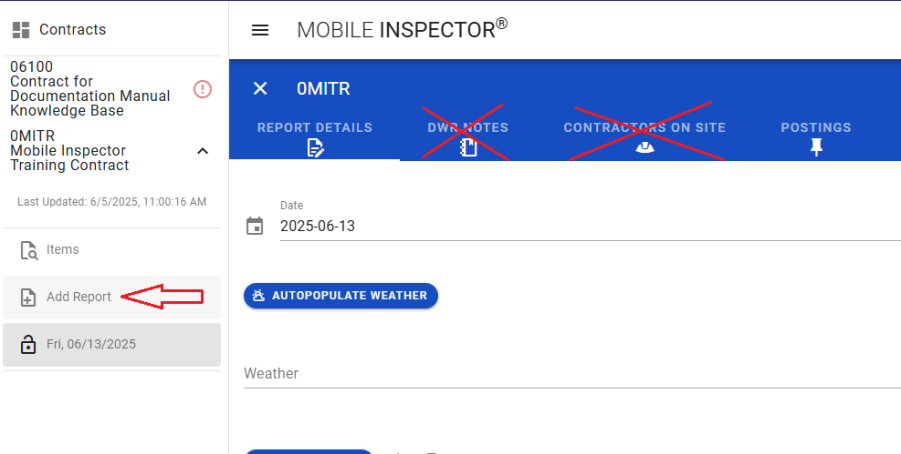
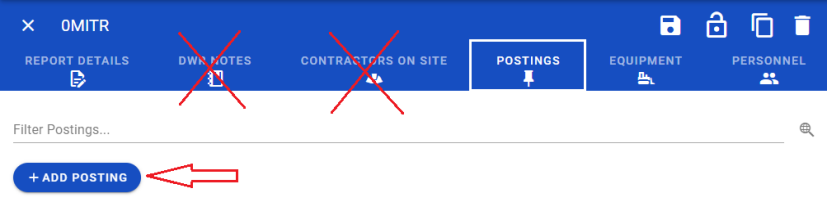
Note: NDOT does not use DWR Notes and Contractors on Site.


POSTINGS
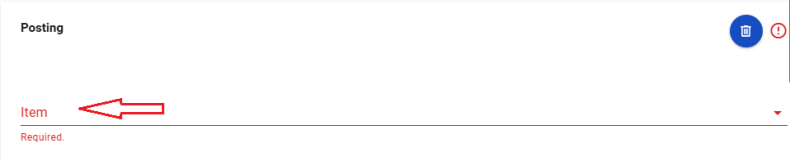
- Tap on POSTINGS and then ADD POSTING.
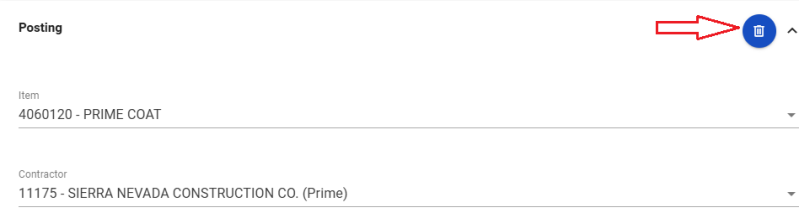
- Tap on Item.
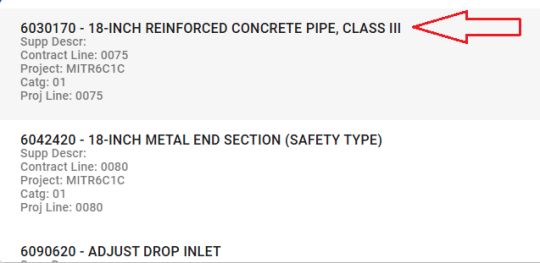
- Tap on the appropriate item.
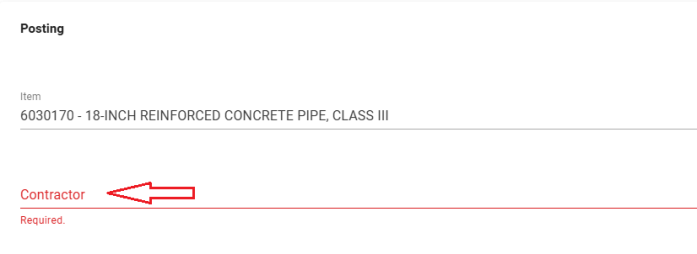
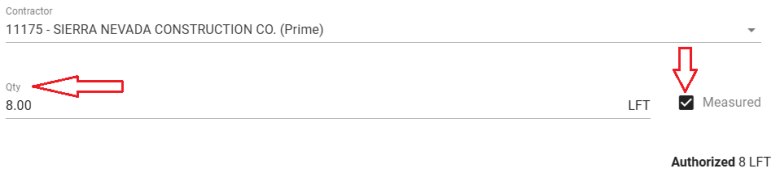
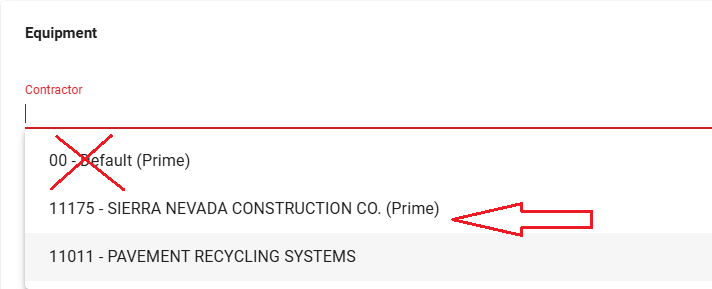
- Tap on Contractor.
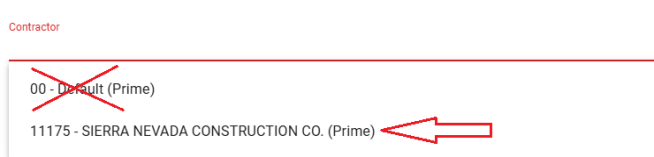
- Tap on the Prime Contractor. NEVER select the 00 - Default (Prime). Doing so will prevent the Report from importing into the AWP program.
- Tap on Qty and enter the quantity for the item posting. The Measured check box can be checked if appropriate.
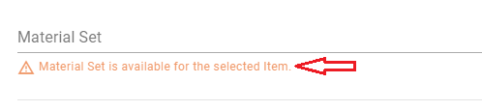
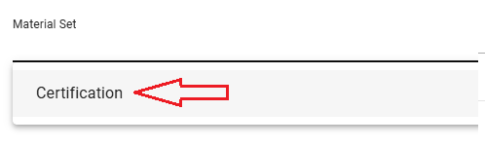
- Tap on Material Set if there is a message indicating there is a Material Set available for the item. Select the appropriate Material Set.
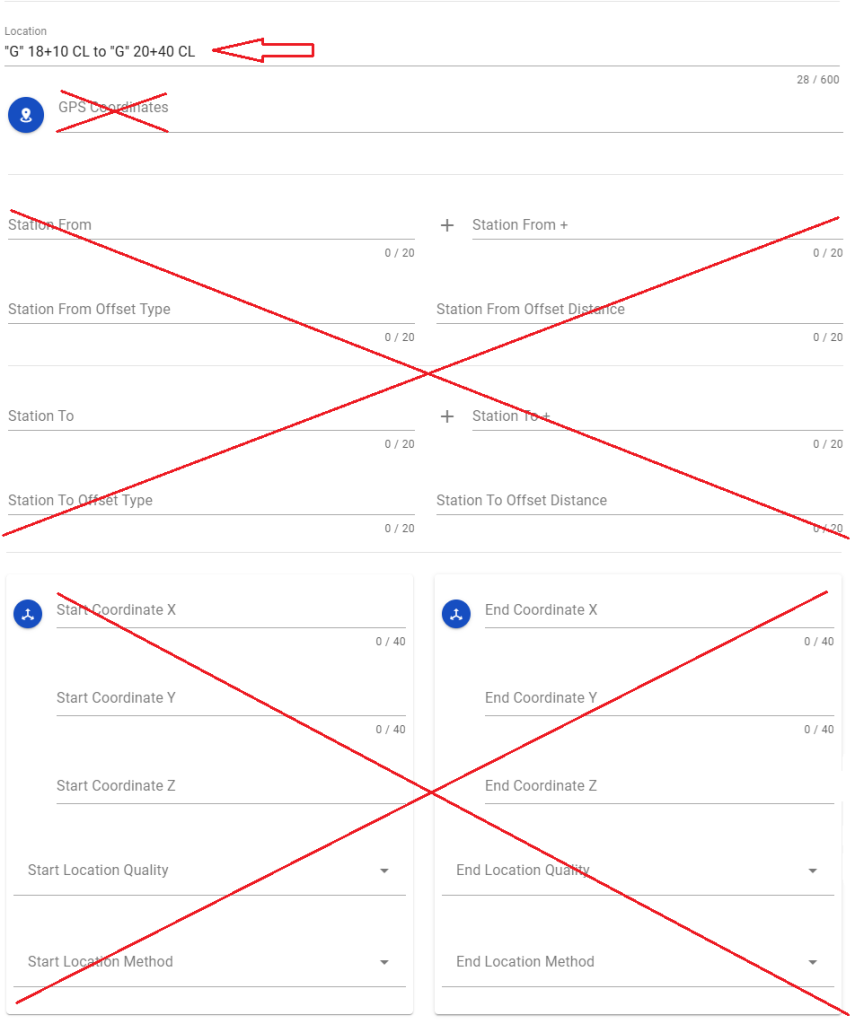
- Tap on Location. Enter the appropriate location information. DO NOT enter information in the GPS Coordinates, Station From and To, Offset Types, or Start and End Coordinate X and Y fields.
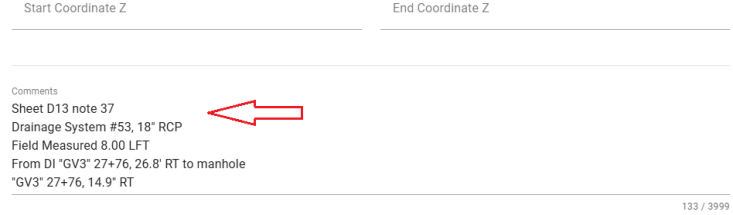
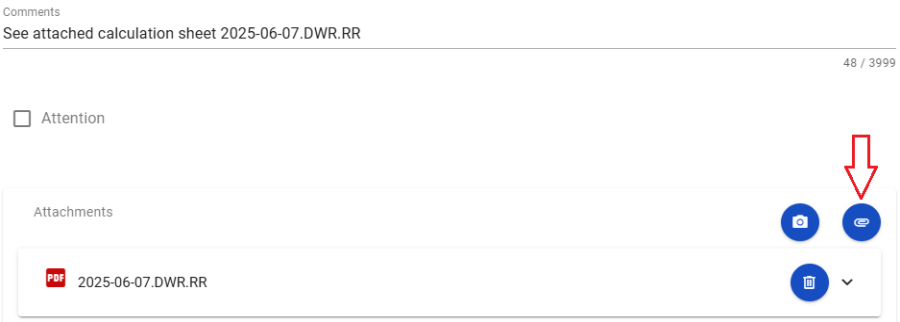
- Tap on Comments. Enter the appropriate comments.
- When you want to bring attention to a situation or an issue with a bid item, check the Attention check box and enter the appropriate required Attention Comments.
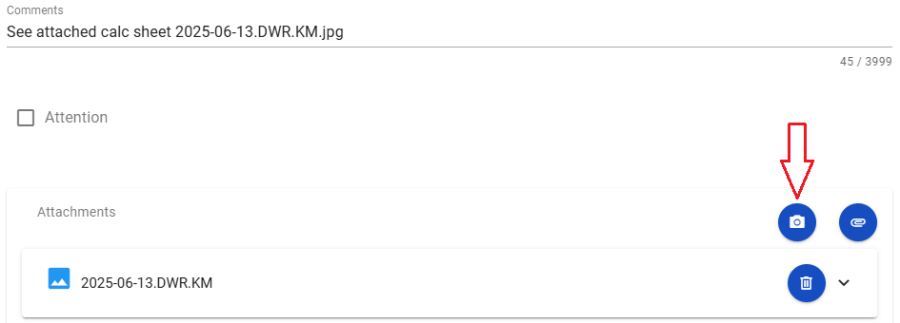
- Limit Attachments to a photo or PDF file of calculation sheets. Make sure to reference the calculation sheet attachment in the Comments field. Tap on the Camera or Paperclip button as appropriate to add the attachment.
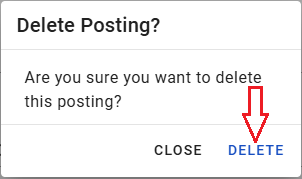
- To remove (Delete) an item posting tap the trash can icon.
- Tap on DELETE.
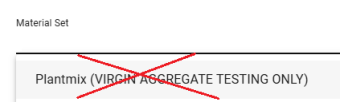
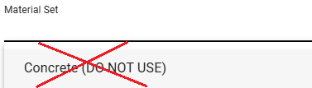
Note: NEVER select the Plantmix (VIRGIN AGGREGATE TESTING ONLY) OR the Concrete (DO NOT USE) Material Sets. These Material Sets are NOT Valid in the Mobile Inspector application. Choosing them will cause your Report to be Rejected.

Note: See Steps 5.a - 5.c in the Report Details section for details on attaching a file.
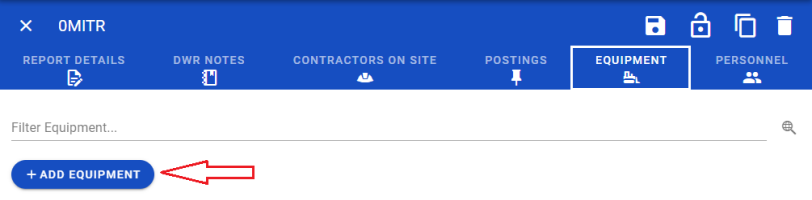
EQUIPMENT
- Tap on EQUIPMENT and then on ADD EQUIPMENT.
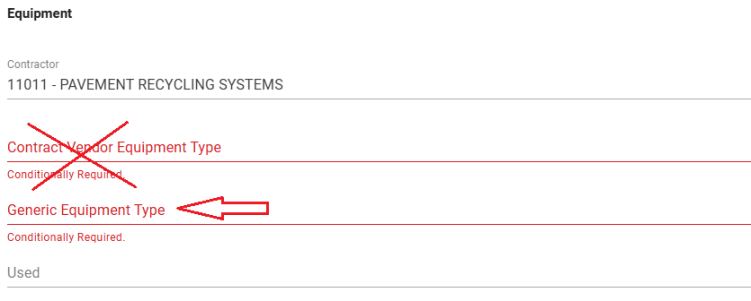
- Tap on Contractor.
- Tap on the Prime or sub contractor for the Equipment. NEVER select the 00 - Default (Prime). Doing so will prevent the Report from importing into the AWP program.
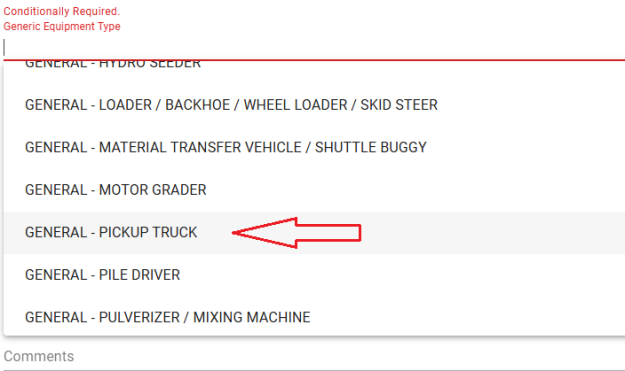
- Tap on Generic Equipment Type.. NDOT does not use Contract Vendor Equipment Type.
- Tap on the Generic Equipment Type.
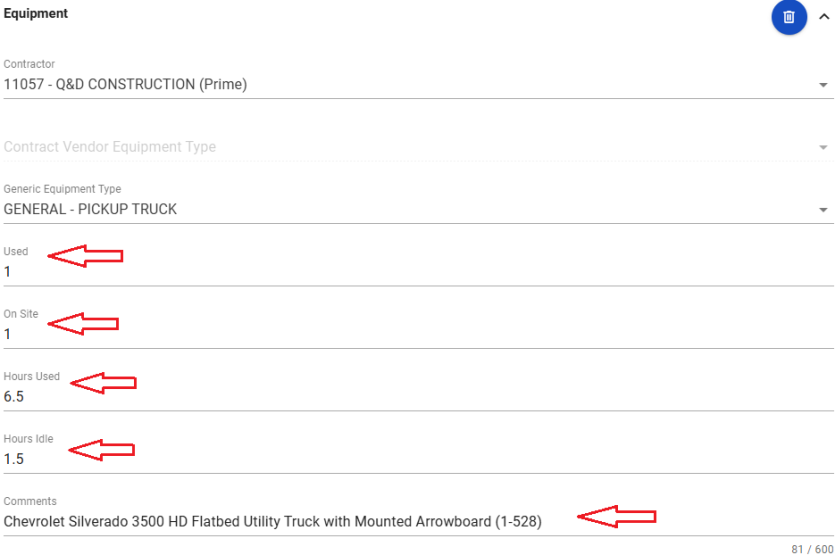
- Enter the Generic Equipment details. Verify with the Resident Engineer and Office Manager on what information is required.
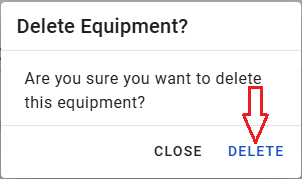
- To remove (Delete) an equipment record tap the Trash Can icon.
- Tap on DELETE.


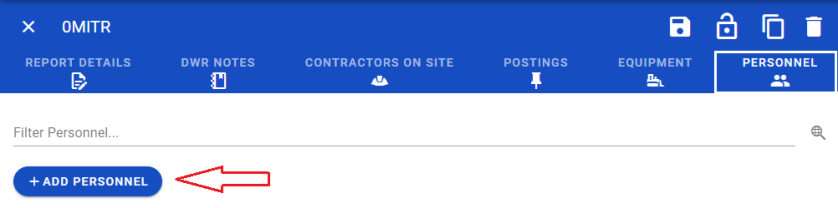
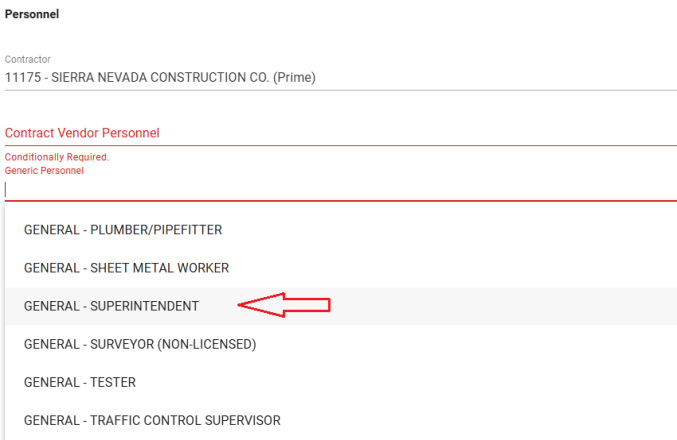
PERSONNEL
- Tap on PERSONNEL and then on ADD PERSONNEL.
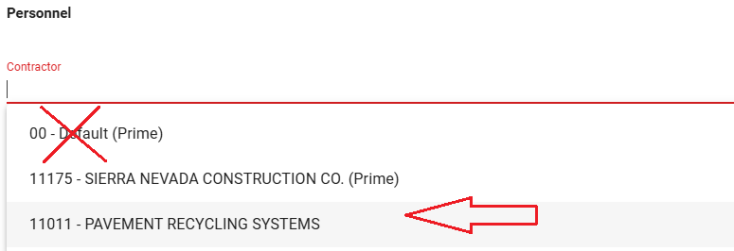
- Tap on Contractor.
- Tap on the Prime or sub contractor for the Equipment. NEVER select the 00 - Default (Prime). Doing so will prevent the Report from importing into the AWP program.
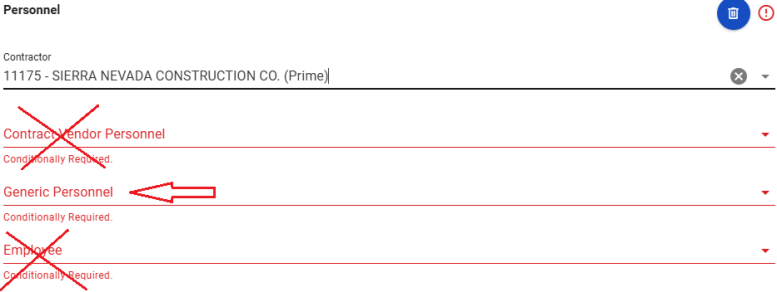
- Tap on Generic Personnel.. NDOT does not use Contract Vendor Personnel or Employee.
- Tap on the Generic Personnel.
- Enter the Generic Personnel details. NDOT does not use Decision Class.
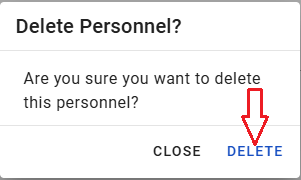
- To remove (Delete) a personnel record tap the Trash Can icon.
- Tap on DELETE.


Note: The Superintendent and all Foreman records MUST include the individual's first and last name.

Note: Once all the report details, postings, equipment, and personnel entries are complete, you are ready to Lock and SYNC the report. Refer to the Locking Reports and SYNC Process topic in this User Guide for details.
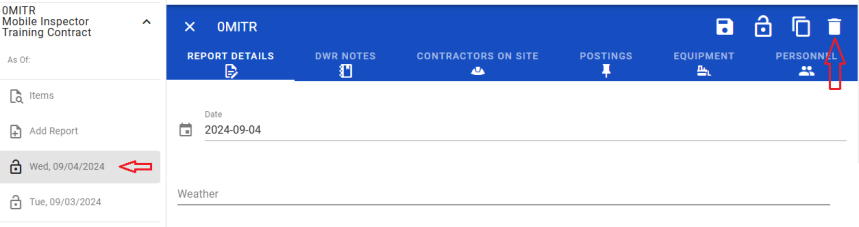
Deleting a Report
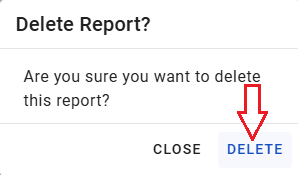
- Tap on the Report to delete and then trash can icon.
- Tap on DELETE.