Creating Mobile Inspector Reports
Create a Mobile Inspector Report daily to document the activity being monitored using the following:
- Report Details – Weather, Attachments, Remarks
- Postings – Item(s), quantity(s), and supporting documentation
- Equipment – Type, number, and hours used
- Personnel – Type, number, and hours used; Foreman and Superintendent must include first and last name

Refer to the Mobile Inspector User Guide for details on using this application.
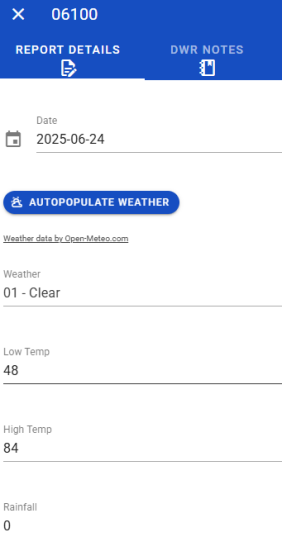
Report Details
- Record the following required information:
- Date
- Weather: When connected to WiFi, the AUTOPOPULATE WEATHER button can be used.
- Low Temp and High Temp
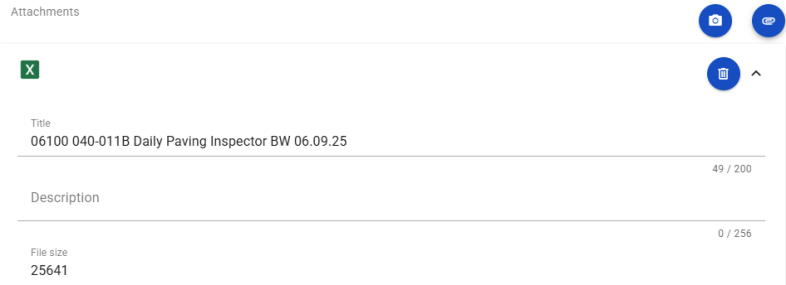
- Attachments: When appropriate (Hot Plant and Paving Inspectors). Send ALL job site photos via email to crew office staff.
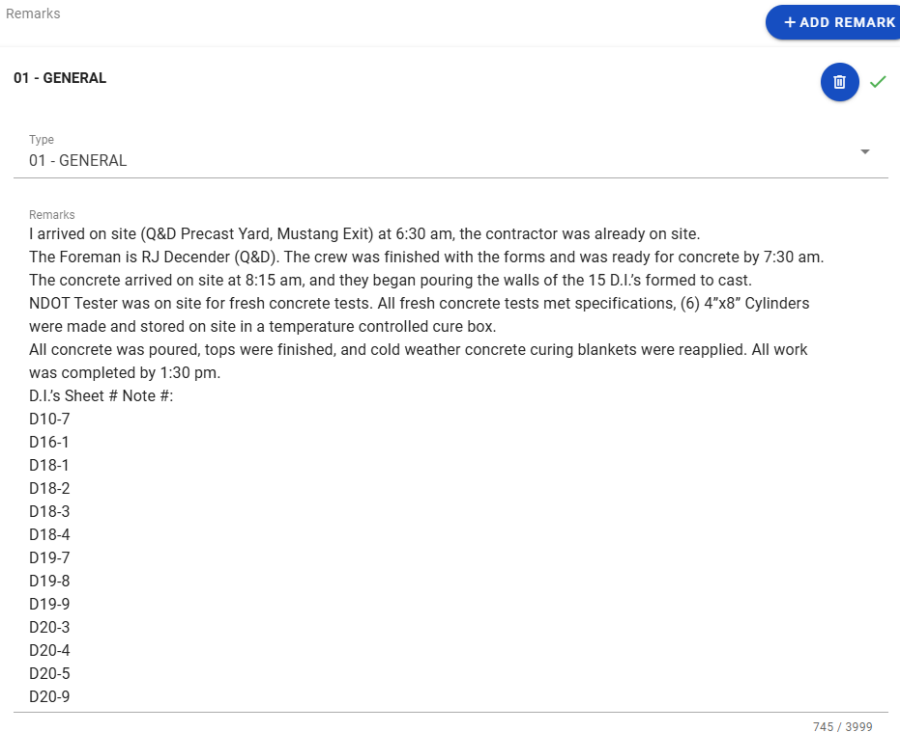
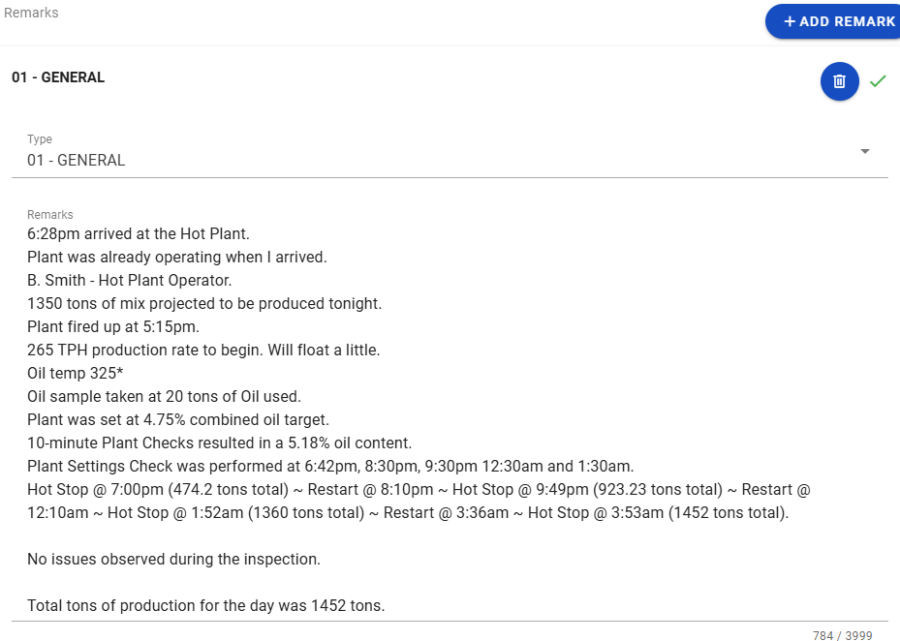
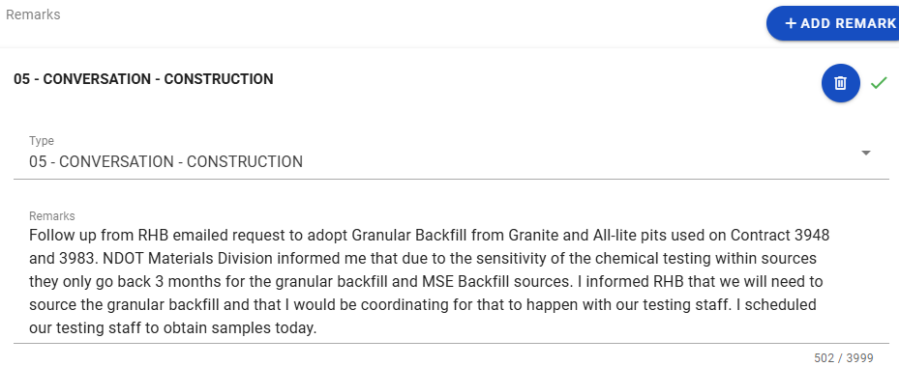
- Remarks: Select the appropriate Remark Type. Multiple Remarks can be added to each Report. Verify with the Resident Engineer and Office Manager on what information is required.
- Record the following information:
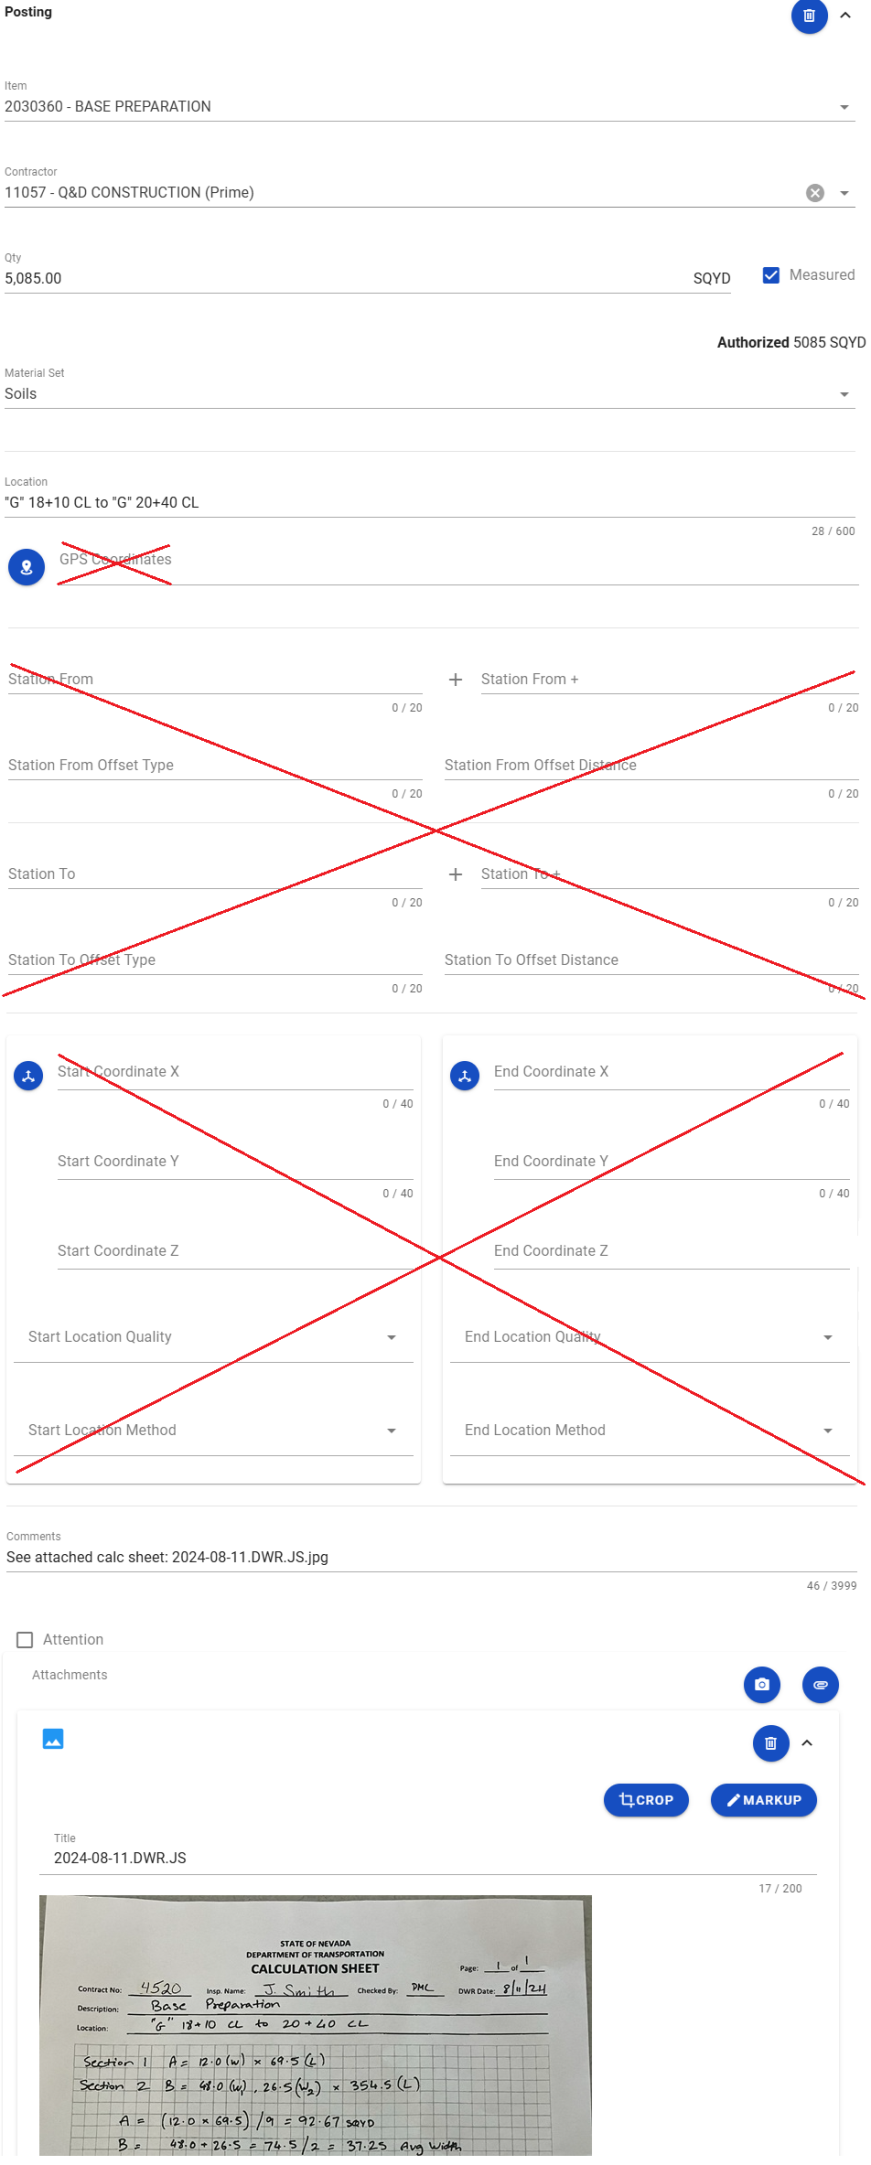
- Item: Select the appropriate Project/Category. If an item is in more than one Project/Category, refer to the AEB report.
- Contractor: ALWAYS the Prime Contractor (Subs are not allowed). DO NOT use the 00 Default Prime Contractor.
- Qty: Based on plan, measurements, and calculations
- Material Set: Select appropriate value (if applicable). NEVER use the Concrete (DO NOT USE) or the Plantmix (VIRGIN AGGREGATE TESTING ONLY) Material Sets in an item Posting!
- Location: Enter appropriate values: line designations, offset (RT, LT, or CL), pull box numbers, conduit numbers, sign numbers, contract plan information, etc. DO NOT enter Location information in the GPS Coordinates, Station From, Station To, Offset, or Coordinate fields.
- Comments: Verify with the Resident Engineer and Office Manager on what information is required.
- Must show calculations when appropriate.
- When calculations are completed on a 040-034 Calculation Sheet form, reference the sheet name (e.g. 2025-06-07.DWR.AR.pdf). Refer to the Calculation Formulas, topic in the Knowledge Base for a 040-034 Calculation Sheet example.
- Note if posting is related to a change order (include change order number).
- Enter agreement information (TYPE, OWNER and AGREEMENT #) of all valve and manhole cover items.
- Attention Flag: Only when appropriate. Use to bring attention to crew office staff, (e.g., overruns, plan errors, change order work, etc.). Must enter Attention Comments.
- Attachments: Limited to Calculation Sheets (photo of completed form OR scanned PDF file). Send ALL job site photos via email to crew office staff.
- Record the following information. Verify with the Resident Engineer and Office Manager on what information is required.
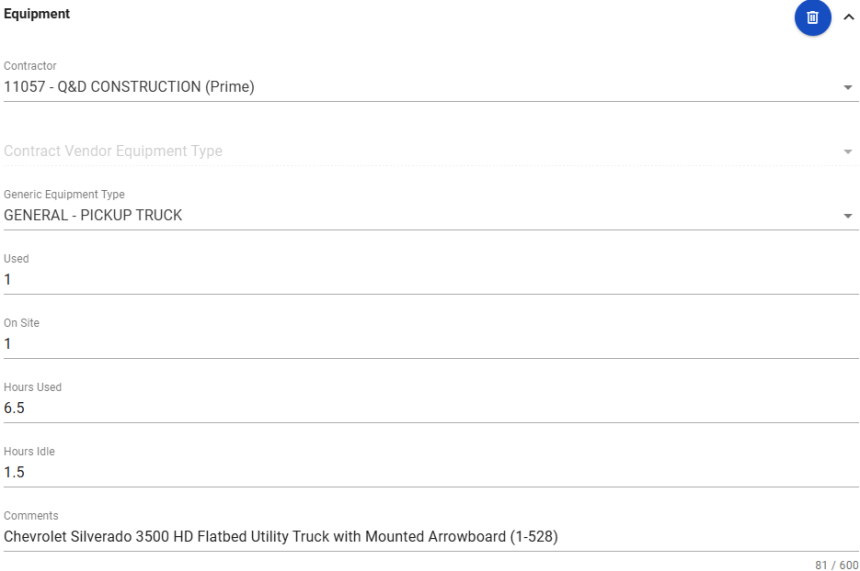
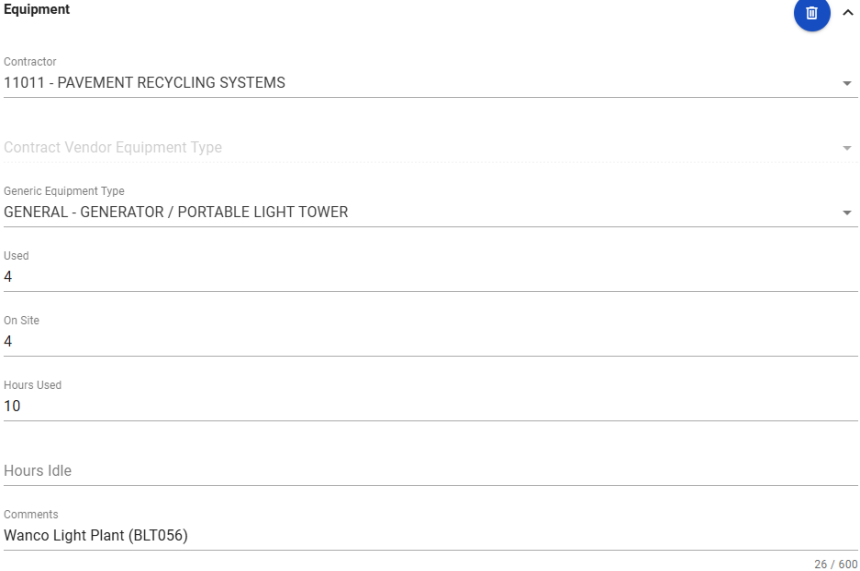
- Contractor: Contractor performing the work (include subs).
- Generic Equipment Type: Select appropriate record from the Generic Equipment Type list.
- Used: How many used.
- On Site: How many of each type.
- Hours Used: Total hours in use.
- Hours Idle: Total hours in an idle status.
- Comments: Details of the type of equipment (e.g., make, model, fuel type, horse power, equipment number, etc.). Include equipment attachment information if applicable (e.g., mounted arrowboard on a utility truck, auger attached to a skidsteer, etc.).
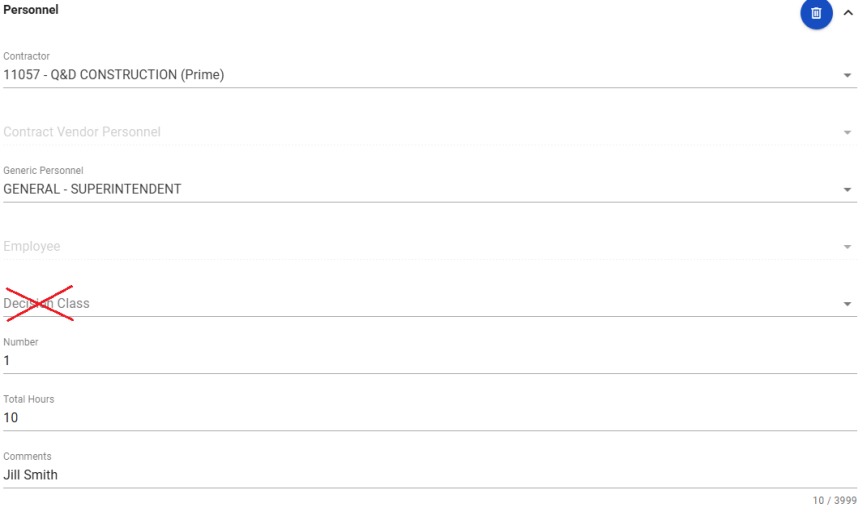
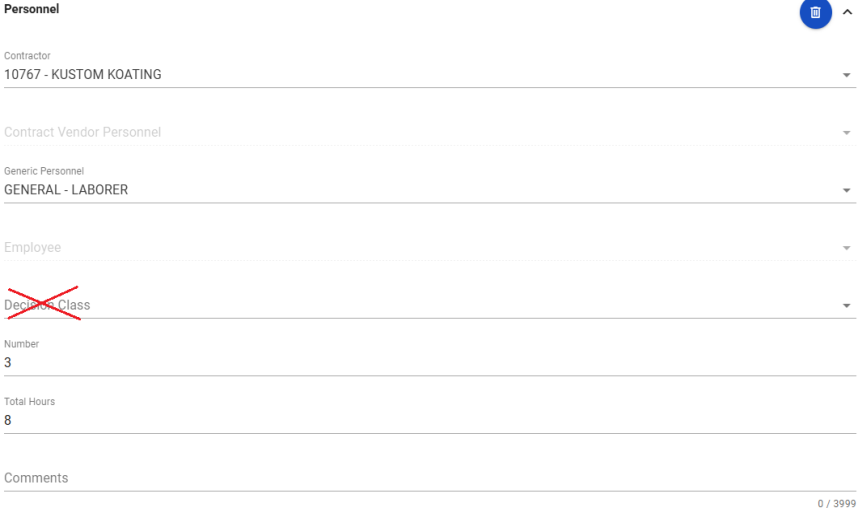
- Record the following information. Verify with the Resident Engineer and Office Manager on what information is required.
- Contractor: Actual Contractor performing the work (include subs).
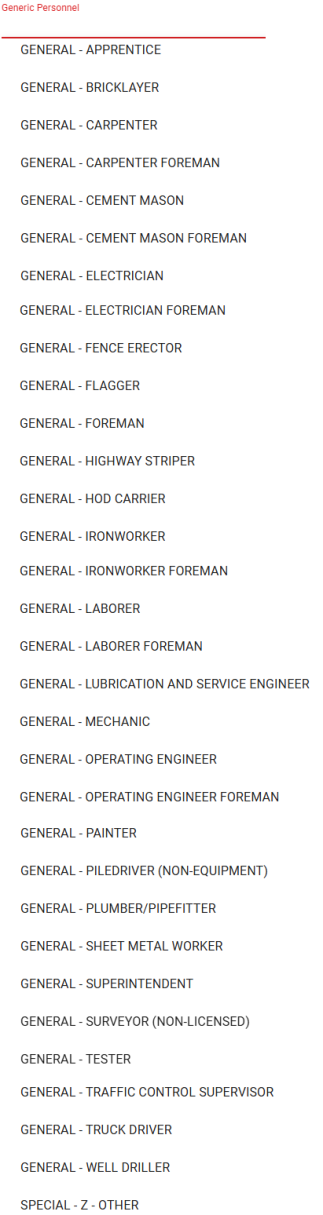
- Generic Personnel: Select appropriate record from the Generic Personnel list.
- Number: How many of each title.
- Total Hours: Total hours worked.
- Comments: All Foreman & Superintendent MUST include first & last name
- Complete a final review of the Mobile Inspector Report, lock the Report and SYNC Data.
Report Details Remarks Examples
_______________________________________________
_______________________________________________
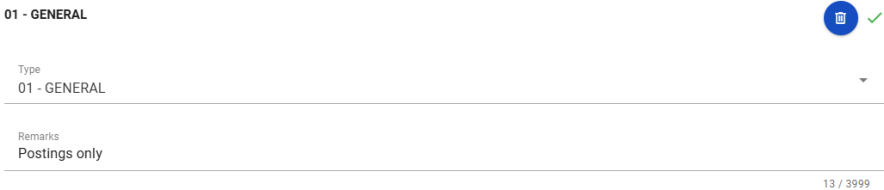
_______________________________________________
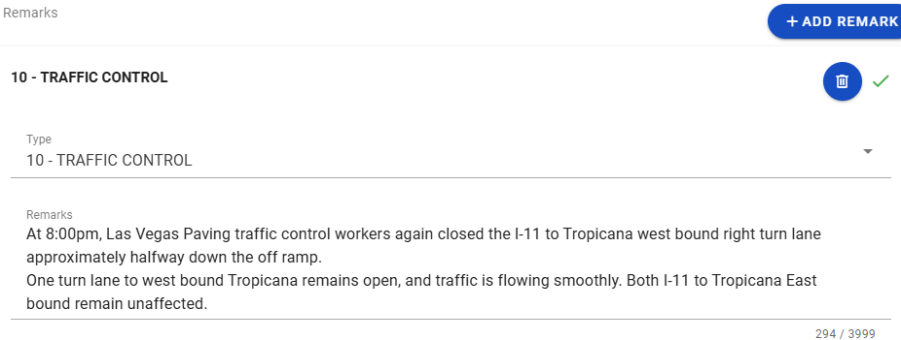
_______________________________________________
Postings
Posting Examples
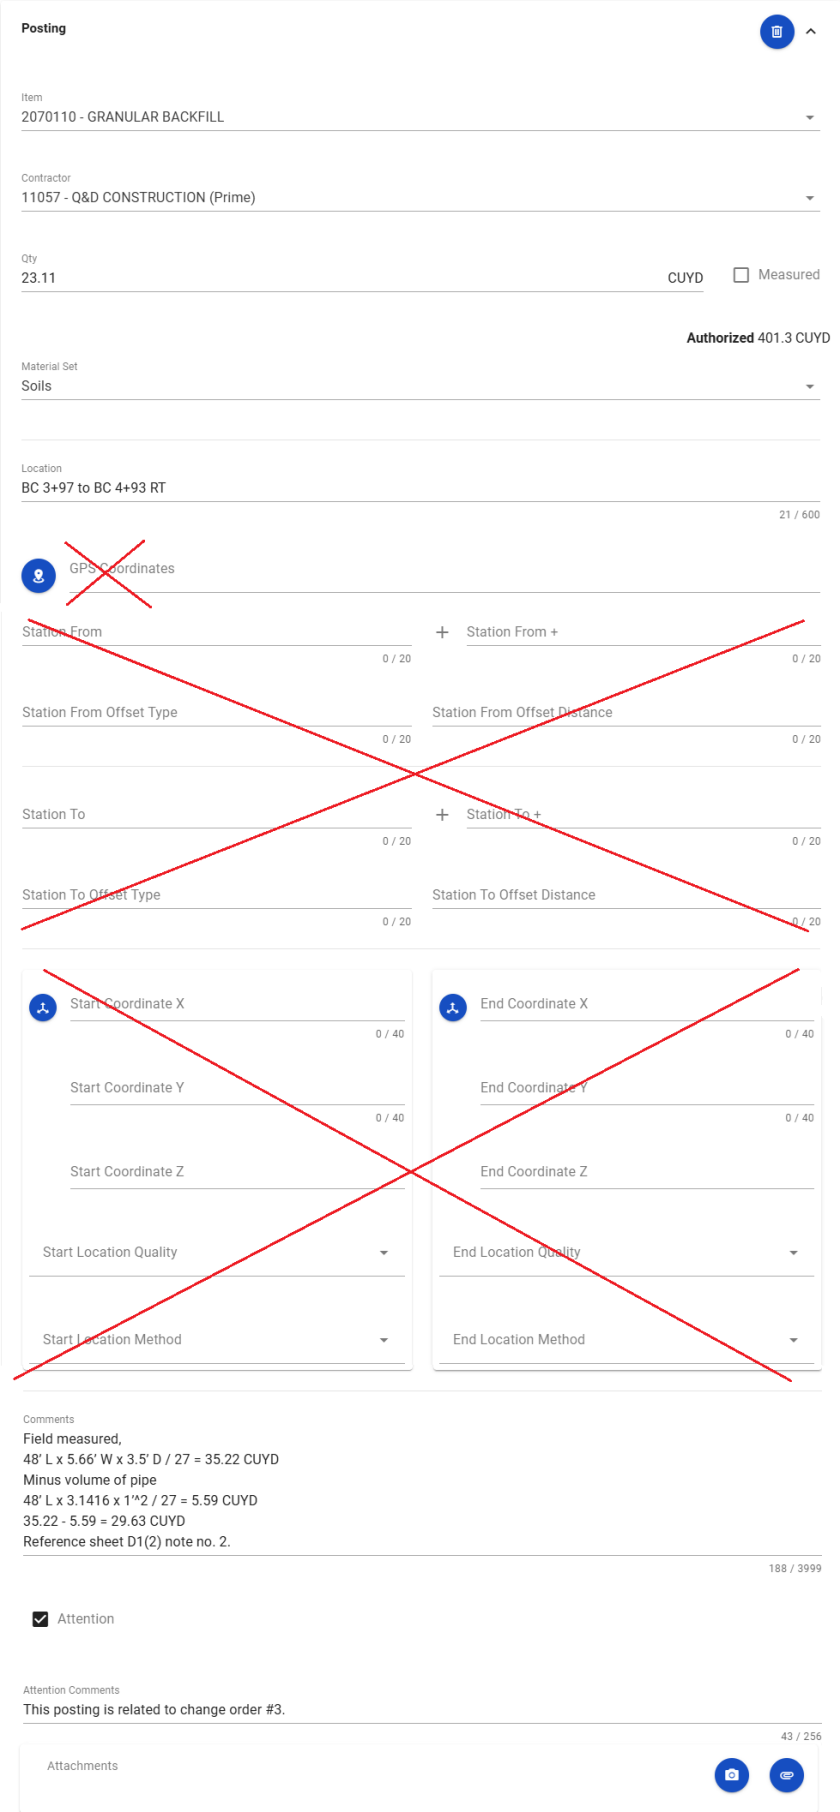
_______________________________________________
Equipment

Equipment Examples
_______________________________________________
Personnel
Personnel Examples
_______________________________________________
Note: When the SYNC process has completed, the information is uploaded into an AWP DWR. This process can take up to 15 minutes to complete. The DWR is reviewed by crew office staff and approved for processing progress payments.
Daily Work Report (DWR) Edits
The crew office staff reviews each Inspector's DWRs for required entries and accuracy. If edits are needed, the Inspector who created the DWR may be required to complete the edits.
There are two options to complete DWR edits: editing a DWR in the AWP software, or editing a rejected DWR in the Mobile Inspector application.
Option 1 - Editing a DWR in AWP
- To select the appropriate role, click the Role selector drop-down arrow attached to the Home button.
- Select the NV Inspector role from the list.
- From the Home page, click Contract Progress under the Construction component.
- In the Quick Find Search box, enter your Contract Number, or click Show first 10.
- Click the Contract number hyperlink.
- The Daily Work Report tab opens. Click Show first 10 (if visible) or place the cursor in the Quick Find Search box and hit enter on the keyboard.
- Locate the DWR to be edited and click the number hyperlink under Sequence.
- Click on the DWR tab(s) where the editing is required.
- When the DWR edits are complete and it has been saved, click the Contract Daily Work Report Component Actions Button and select the Submit For Approval option.


Option 2 - Editing a rejected DWR in Mobile Inspector
- Ensure the iPad is connected to WiFi before proceeding with the following steps.
- Tap the Menu (three horizontal lines) icon.
- Tap on SYNC.
- Tap on SYNC DATA.
- A pop-up Status message will display for a few seconds indicating the SYNC is in process.
- A SYNC Complete message will display. Tap on DISMISS.
- A “New Rejected Reports” notice will display. Tap on DISMISS.
- The Rejected Report will be Locked with a Rejected notice.
- Tap on the Rejected Report and then the unlock icon in the upper right corner.
- An “Unlock Rejected Report?” message will display. Tap on UNLOCK.
- Complete the edits indicated by the crew office and tap on the Lock icon in the upper right corner.
- Tap on LOCK.
- Tap on SYNC.
- Tap on SYNC DATA.
- A pop-up Status message will display for a few seconds indicating the SYNC is in process.
- A SYNC Complete message will display. Tap on DISMISS.


Note: If you receive the below message when you have corrected a Report, Locked it, and ran the SYNC DATA process, contact the crew office and ask someone to change the Status of the DWR to Rejected. Tap on DISMISS. When the next SYNC DATA process completes, the Report will import into AWP.
