Daily Work Reports (DWR)
A Daily Work Report (DWR) is used to document daily site conditions and track quantities of contract items. Once a DWR has been approved, the AWP program uses the item postings contained in the DWR to calculate the contractor’s payment when creating the estimate.
Important: A Daily Work Report (DWR) cannot be added and saved until the Informational CREW-REVIEW date has been entered in the Contract Administration Component (Refer to Chapter 1, Section - Entering Crew Review Date and Construction Start Date) for details. The DWR MUST have a date of on or after the CREW-REVIEW date.
Adding a DWR
- Confirm current role is set to NV Crew Office or NV Inspector.
- From the Home page, click Contract Progress under the Construction component.
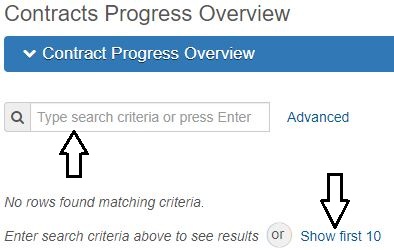
- In the search box, enter your Contract Number, or click Show first 10.
- Click the Contract number hyperlink.
- Click the Daily Work Reports Tab.
- Click the Add button.
- The DWR opens the General Tab. Enter all pertinent information.
- DWR Date - Defaults to the current date.
- Inspector - Defaults to the user who created the DWR.
- Weather - Optional for Office Manager postings.
- Rainfall - Optional for Office Manager postings.
- Low Temp - Optional for Office Manager postings.
- High Temp - Optional for Office Manager postings.
- Remarks - There can be multiple remarks as needed. Be sure to use the most appropriate remark type.
- Go to the Contract Daily Work Report Component Actions Menu drop-down and select Attachments.
- Click the Select File button.
- Browse to the location of the spreadsheet, select the file, and click the Open button.
- Click the Save button.
- Click the Previous button.
- Click the Save button in the top right corner of the Daily Work Report component.
- Complete all tabs as appropriate.
- Notes Tab: Can be added (by any AWP user) before or after DWR is Approved and included in a payment estimate.
- Click the New button.
- Enter the Note and click the Save button.
- Contractors on Site Tab: The Prime Contractor and all appropriate subcontractors must be added here PRIOR to adding Contractor Equipment, Contractor Personnel, and Postings.
- Click the Select Contractors button.
- Select the contractor(s) that were observed performing work and click the Add to DWR Contractors button. Office Managers completing a DWR will only select the Prime contractor. DO NOT use the 00 Default Vendor record.
- Click the Save button.
- Contractor Equipment Tab
- To add equipment, click the Contractor's Row Actions menu and select the Select Generic Equipment option.
- Select the equipment that was observed/inspected performing work and click the Add to DWR Contractor Equipment button.
- If not already expanded, click the chevron to the left of Contractor to expand the view and see the selected equipment.
- Complete the following for each equipment added. Confirm with Resident Engineer and Office Manager with crew requirements.
- Number On Site
- Number Used
- Hours Used
- Hours Idle
- Comments - Use this field to provide specific details on the equipment.
- Click the Save button.
- Repeat for each equipment on the job site.
- Contractor Personnel Tab
- To add personnel, click the Contractor's Row Actions drop-down and select the Select Generic Personnel option.
- Select all personnel that were on the job site and click the Add to DWR Contractor Personnel button.
- If not already expanded, click the chevron to the left of Contractor to expand the view and see the selected personnel.
- Complete the following for each personnel added.
- Number On Site
- Total Hours
- Comments - Name is required for all FOREMAN & SUPERINTENDENT personnel type.
- Click the Save button.
- Repeat for each personnel on the job site.
- Postings Tab:
- Click Select Items button .
- Select the item(s) that were removed/installed for payment which were observed/inspected for that day and click the Save button.
- For each item, click the chevron above Item ID to expand the item details.
- Complete all fields as applicable. Enter ALL Location information in the Location field.
- Click the Save button.
- Go to the item's Open Row Actions Menu drop-down and select Attachments.
- Click the Select File button.
- Browse to the location of the calculation sheet, select the file, and click the Open button.
- Click the Save button.
- Click the Previous button.
- If the DWR is complete and is ready to submit for approval, click the Row Actions drop-down and select Submit For Approval.


Note: Paving and Plant Inspectors have the option to use AWP DWRs to track their daily activities. They will attach a copy of the appropriate 040-011A Daily Plant Inspector spreadsheet or 040-011A Daily Plant Inspector spreadsheet to the DWR.


Important: This Save MUST be completed before adding Equipment, Personnel or Postings.


Important: The Material Set field MUST be populated with the correct Material Set on all items that have a material associated. Items that are associated with a JMF or Mix Design may have multiple Material Sets. Make sure to select the correct JMF/Mix Design.

Note: Item posting attachments are limited to calculation sheets (photo of completed form OR scanned PDF file).


Reviewing a DWR from Mobile Inspector
Inspectors complete Mobile Inspector reports to document daily construction activities, Contractor/Sub-contractor personnel and equipment, and enter item quantity postings. These reports are imported into AWP as a DWR in a Pending Approval status. These DWRs include a Sync ID to indicate they are a Mobile Inspector report. ALL Inspector DWRs MUST be reviewed by crew office staff for accuracy. This review must be completed before the DWR can be approved by crew office staff.
Important: If edits are needed on an Inspector's DWR, the Inspector (creator) of the DWR can to log into the AWP program, make the edits, and submit the DWR for Approval (Submit For Approval). See the next Section, Editing a Mobile Inspector DWR, in this User Guide for details.
- From the Daily Work Report tab in Contract Progress, click Show first 10 (if visible) or place the cursor in the Quick Find Search box and hit enter on the keyboard.
- Locate the DWR to be reviewed, then click the number hyperlink under Sequence.
- Review the information in all the DWR tabs.
- If the Mobile Inspector DWR is complete and accurate it can be Approved. Proceed to Section, Approving a DWR, in this User Guide for details.


Important: Check ALL Item Postings to make sure the Material Set field is populated accurately for all bid items that have associated materials. If the Material Set is incorrect the DWR will need to be corrected.

Important: If a DWR edit is required, contact the Inspector who created the DWR, if appropriate, and have them follow the directions in the next Section, Editing Mobile Inspector DWRs, in this User Guide for details.
Editing a Mobile Inspector DWR in AWP
Editing a Mobile Inspector DWR can be completed by the Inspector who created it, within the AWP program (iPad using the Safari browser or PC).
- To select the appropriate role, click the Role selector drop-down arrow attached to the Home button.
- Select the NV Inspector role from the list.
- From the Home page, click Contract Progress under the Construction component.
- In the Quick Find Search box, enter your Contract Number, or click Show first 10.
- Click the Contract number hyperlink.
- The Daily Work Report tab opens. Click Show first 10 (if visible) or place the cursor in the Quick Find Search box and hit enter on the keyboard.
- Locate the DWR to be edited and click the number hyperlink under Sequence.
- Click on the DWR tab(s) where the editing is required. (Use the Adding a DWR Section, Steps 7 - 9 in this topic) for guidance on editing the information in the tabs.
- When the DWR edits are complete and it has been saved, click the Contract Daily Work Report Component Actions Button and select the Submit For Approval option.


Approving a DWR
DWRs must be Approved so the item postings within them will be included in the next payment estimate. ALL DWRs must be reviewed by crew office staff PRIOR to them being Approved.
- Ensure Current Role is set to Crew Office.
- From the Daily Work Report tab in Contract Progress, click Show first 10 (if visible) or place the cursor in the Quick Find Search box and hit enter on the keyboard.
- Locate the DWR to be approved, then click the number hyperlink under Sequence.
- When the DWR is complete and ready to be included in a payment estimate, click the Contract Daily Work Report Component Actions Button and select the Approve option.


Changing a DWR to Rejected or Draft Status
An Approved DWR can be changed back to a Rejected or Draft status as long as it has NOT been included in a payment estimate. A Pending Approval or Approved DWR is set back to a Rejected or Draft status in order to edit the DWR.
- From the Daily Work Report tab in Contract Progress, click Show first 10 (if visible) or place the cursor in the Quick Find Search box and hit enter on the keyboard.
- Locate the DWR to be set back to Draft, then click the number hyperlink under Sequence. DWRs in either Pending Approval or Approved can be set back to Draft.
- Click the Contract Daily Work Report Component Actions Button and select the Reject option. NOTE: When a Mobile Inspector Report is going to be edited in the Mobile Inspector application the DWR must remain in the Rejected status.
- Click the Contract Daily Work Report Component Actions Button again and click Change to Draft. The DWR can now be edited.


Creating the DWR Report
The DWR Report can be created at any status: Draft, Pending Approval, Rejected, or Approved.
- From the Daily Work Report tab in Contract Progress, click Show first 10 (if visible) or enter the DWR Date in the Search field.
- Locate the DWR for which the report is to be created, then click the number hyperlink under Sequence.
- Click the Contract Daily Work Report Component Actions Button and click DWR Report.
- Accept all Default values in the Generate Report - DWR Report window and click the Execute Button.
- The DWR Report opens in a new browser window.
- At this point the DWR Report can be printed to a PDF file, following the browser print options. If a PDF copy is not needed, close the browser tab to delete the report.
- Click the Previous button to return back to the DWR.


Deleting a DWR
DWRs can be deleted only if they are in a Draft status and have NOT been included in a payment estimate.
- From the Daily Work Report tab in Contract Progress, click Show first 10 or enter the DWR Date in the Search box.
- Click the DWR Row Actions drop-down on the DWR to be deleted and select Delete.
- Click the Save button.


Copying DWR Information to a New DWR
The Copy option in the DWR Row Actions allows a user to copy a DWR that is similar to another DWR, eliminating the need to re-enter data for each new DWR. A new copied DWR includes the following information from the DWR it was copied from:
- Remarks
- Contractor Equipment and Personnel information - Number Used and Hours Used will be blank. Comments are copied.
- Item postings - All posted quantities are set to 0.00. All Station, Offset and Location information is copied.
- From the Daily Work Report tab in Contract Progress, click Show first 10 or place the cursor in the Quick Find Search box and hit enter on the keyboard.
- Click the DWR Row Actions drop-down on the record to copy and select Copy.
- The Copy Contract Daily Work Report window opens.
- Select the options to copy and click the Save button.
- A new DWR opens in the General Tab. It defaults to the current date. Change the date if appropriate and click the Save button.
- Make appropriate changes or additions to the copied DWR information.


