Daily Diaries
A Daily Diary is used to document pertinent daily contract activities and assess working days. It also can incorporate information from Approved Daily Work Report (DWR’s) for the corresponding day.
Important: One Daily Diary, per contract, per day shall be completed by the Resident Engineer.
Adding a Daily Diary
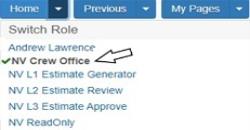
- Confirm current role is set to NV Crew Office.
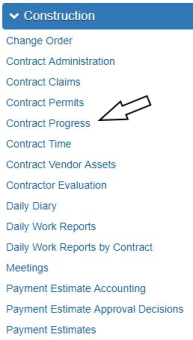
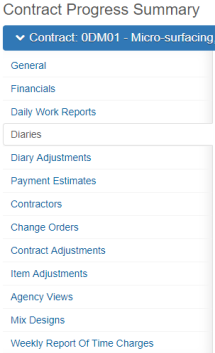
- From the Home page, click Contract Progress under the Construction component.
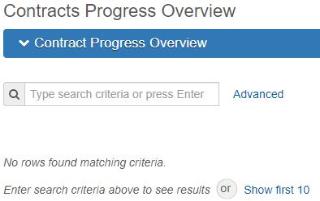
- In the search box, enter the Contract Number, or click Show first 10.
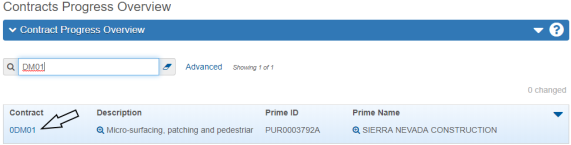
- Click the Contract number hyperlink.
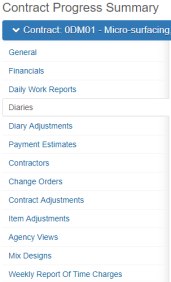
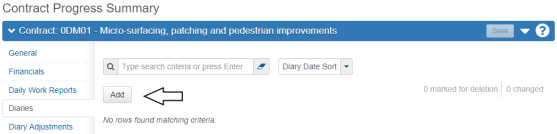
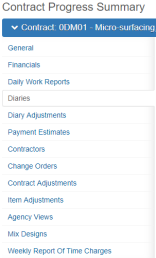
- Click the Diaries tab.
- Click Add.
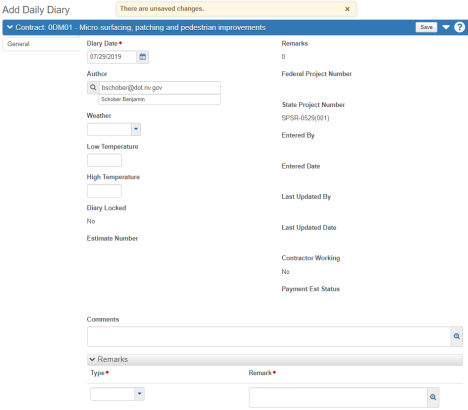
- Enter the Diary Date, if other than today's date.
- Click the Save button.
- In the Component Row Action drop-down, select Populate Related DWR Weather.
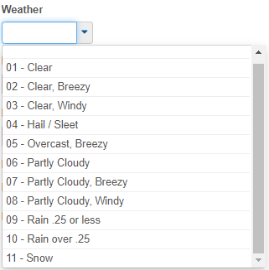
- If there was a Weather conflict, click the drop-down list for Weather and choose from the list.
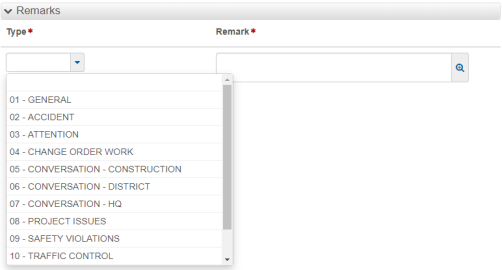
- In the Remarks section, select an appropriate Remark Type from the drop-down, There can be multiple remarks as needed. Be sure to select the most appropriate remark type.
- Click the Save button.
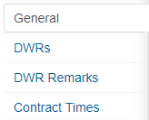
- Complete all tabs as appropriate.
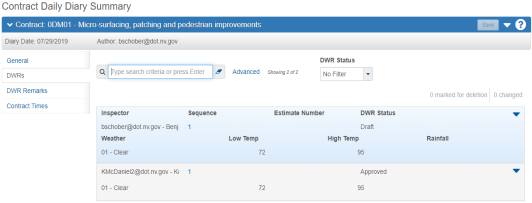
- DWRs:Confirm all DWRs that need to be included for this Diary are Approved.
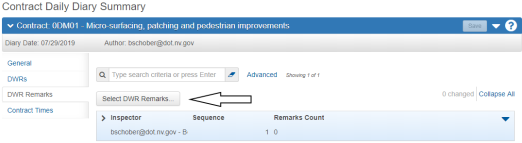
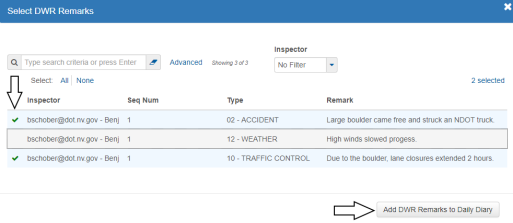
- DWR Remarks:Add and Review DWR Remarks from all Approved Inspector DWRs with the same date as the Daily Diary.
- To add the Inspector's DWR Remarks, click Select DWR Remarks.
- Select the Remarks and then click Add DWR Remarks to Daily Diary.
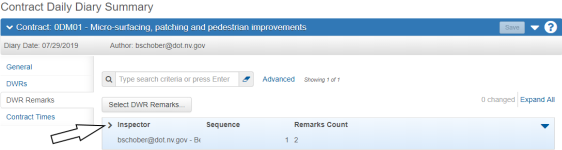
- Click the chevron to expand the DWR Remarks.
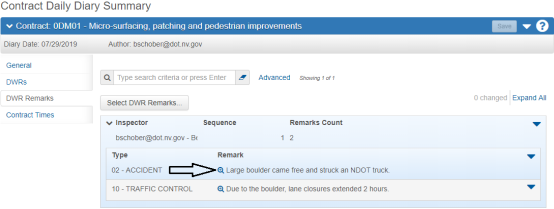
- Review attached Remarks. Click the Large Text Field Expand icon to see the entire Remark.
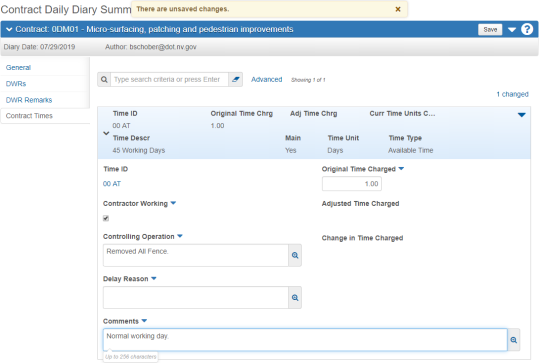
- Contract Times: AWP tracks only Main Site Times for “Working Days”. An Original Time Charge of one day is required for each working day, in order to track the amount of time that the Contractor worked on a contract.
Complete all pertinent information for a Working Day (00 AT) Site Time.- Original Time Charged: The only valid entries for this field are 1 or 0. This field is required if you want to charge a day to a Working Day contract.
- Contractor Working: Check if the Prime Contractor worked that day.
- Controlling Operation: Enter the controlling operation for day being charged.
- Delay Reason: Enter the reason for the delay if the contractor is off schedule.
- Comments: Explain why a day was not charged or any other appropriate comments.
- Click the Save button.

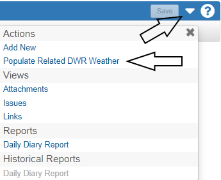
Note: This action will bring in the highest High Temperature and the lowest Low Temperature from all DWRs with the same date as the Daily Diary. It will also bring in Weather unless there is a conflict in weather entries on DWRs with the same date. If there is a conflict, the Weather field will remain blank until it is selected by the Daily Diary Author.

Note: Completion Date (00 CD) and the Clean Up (00 Clean) Site Times will not have records in the Contract Times tab. These Site Times still require a Daily Diary to be completed each day to document the status of the contract.

Note: The Daily Diary can be edited or deleted until it is included in a payment estimate. When it is included in a payment estimate, the Diary becomes Locked.
Deleting a Daily Diary
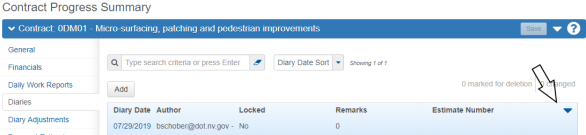
- Under Contract Progress Summary, click the Diaries tab.
- Click the Diary row action button.
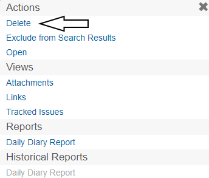
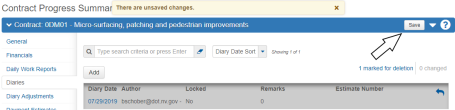
- Click Delete.
- Click the Save button.
Diary Adjustments
A Working Days (00 AT) Site Time Daily Diary record can be adjusted AFTER a pay estimate has been approved.
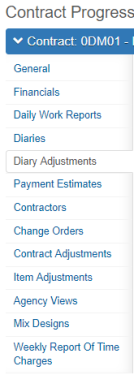
- Select the Diary Adjustments tab.
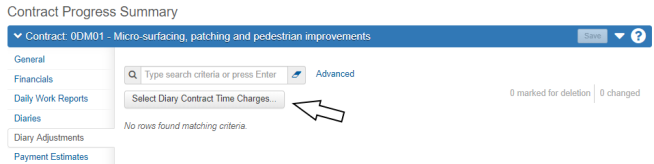
- Click the Select Diary Contract Time Charges button.
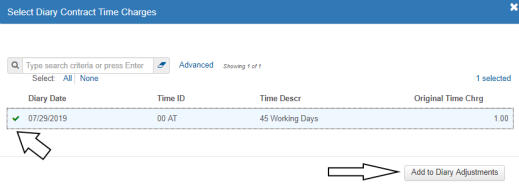
- Select the Diary to be adjusted and then click the Add to Diary Adjustments button.
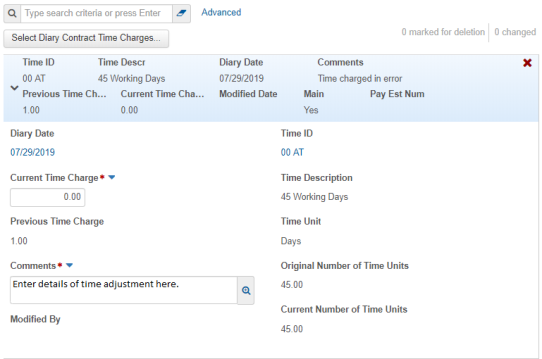
- Update the Current Time Charge field and enter appropriate Comments. To decrease the amount of time charged, enter 0.00 in the Current Time Charge field. To increase the time charged, enter 1.00 in the Current Time Charge field.
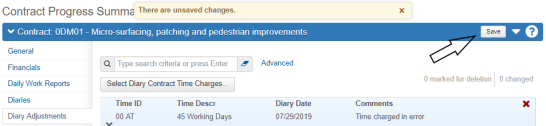
- Click the Save button.
Generating the Daily Diary Report
The Daily Report can be generated at any point.
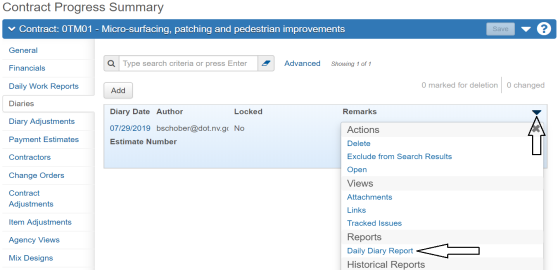
- Under Contract Progress Summary, click the Diaries tab.
- Click the Daily Diary Row Actions drop-down on the Daily Diary and click Daily Diary Report.
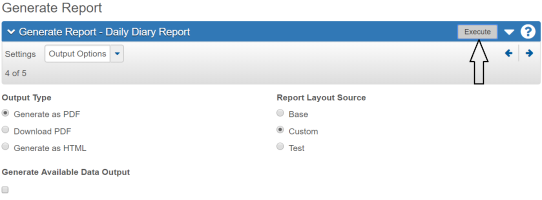
- Accept all Default values in the Generate Report - Daily Diary Report window and click the Execute button.
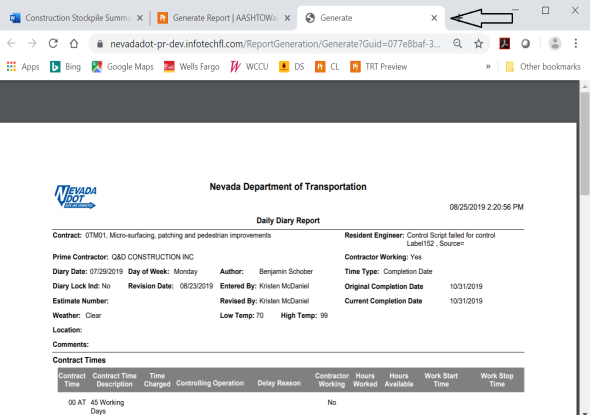
- The Daily Diary Report opens in a new browser window.
- At this point the Daily Diary Report can be printed to a PDF file, following the browser print options. If a PDF copy is not needed, close the browser tab to delete the report.
- Click the Previous button to return back to the Daily Diary list.